


DIY Spinning Top Stem Craft
This DIY Spinning Top STEM Craft is a quick hands-on activity made using a few basic materials. We made ours in under 20 minutes, with most of that time spent colouring and decorating, and once the first one was working, the experimenting really began.

Now that my children are a little older, our crafting activities have changed, and I’ve noticed that they really like making things that can move! So they really enjoyed making these spinning tops. For me, it was a quick activity with minimal prep and minimal mess… what’s not to love?

So if you’re planning a simple STEM activity for a classroom, looking for an easy craft for a group, or want a fun hands-on project to enjoy at home, this spinning top is quick to prepare and gives children plenty to experiment with.
At A Glance:
- Age: Around 7+ or with adult supervision due to using a sharp point to make a hole in the bottle lid.
- Time: 10-20 minutes
- Prep: Minimal
- Best For: Home, Groups, Kids Craft Classes, Simple STEM Activities
What You’ll Need:
You only need a few simple materials for this spinning top
- Paper or Card
- Plastic Bottle Lid
- Cotton Ear Bud/ Swab
- Blue Tack
- Scissors
- Colouring Pens
- A Skewer or Compass for making the small holes
If you’re using the ready-to-print version, you’ll also need the spinning top templates from the activity pack. View The Spinning Top Template on Etsy
What Does The Activity Involve?
Children create their own spinning top and then test it to see how well it spins.
The making part is fairly straightforward, but the really fun part comes afterwards. Once they have a working spinning top, children can start changing things and comparing the results.
They might experiment with:
- different colours and patterns
- different paper or card
- different designs
- the balance of the spinning top
- how securely the central part is held
- how long their spinning top can keep going
We had a lot of fun trying to see if we could make our colours blend as they spun and trying different sized bottle lids… we even made a jumbo one with a peanut butter jar lid!
Testing Our Spinning Top!
Tips From Our Testing
- Younger children may need help with making the hole in the bottle lid and pushing the cotton bud through.
- Prep the bottle lid in advance. If running this activity with younger children or a large group, I would prep the bottle lid by putting a hole in it first. This would make the activity run much smoother and quicker.
- Keep the cotton bud secure. We found the spinning top worked best when the cotton bud couldn’t wobble inside the lid. A generous piece of Blu Tack helps hold everything firmly in place.
- Don’t worry if you only have paper. We tested both paper and card. Card is more durable, but both versions spun really well.
Buy The Spinning Top Template and Instructions
If you want to skip the prep and get straight to making, I’ve put together the templates and step-by-step photo instructions you need to make your own spinning top.
The DIY Spinning Top Stem Craft Activity Pack includes:
- 6 patterned templates,
- 6 blank templates for creating your own designs
- step by step photograph instructions.


Made one? Tag @printandplaydays or use #printandplaydays — I’d love to see what you make.
Want Another Activity To Try?
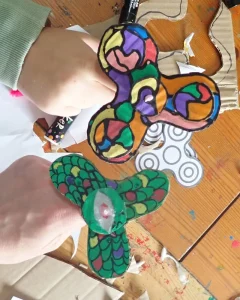
If your kids enjoyed making something that spins, I’ve got another simple one you can try. So don’t put away those cotton buds just yet!
You can read about here D.I.Y Cardboard Fidget Spinner
Or you can jump straight in and download the free cardboard fidget spinner template and instructions.
Pin For Later